 Plumbing Advisors Editorial TeamEditorial StandardsUpdated July 5, 2026Source-Checked
The cost to repipe a whole house varies widely, depending on your home’s size, the type of piping used, and how accessible your plumbing is. Rather than a flat price, expect a personalized estimate shaped by these factors. Understanding what goes into a repipe and the major cost drivers helps you spot a fair, guidance-only quote and plan for your home’s needs.
What Is Involved in a Whole-House Repipe?
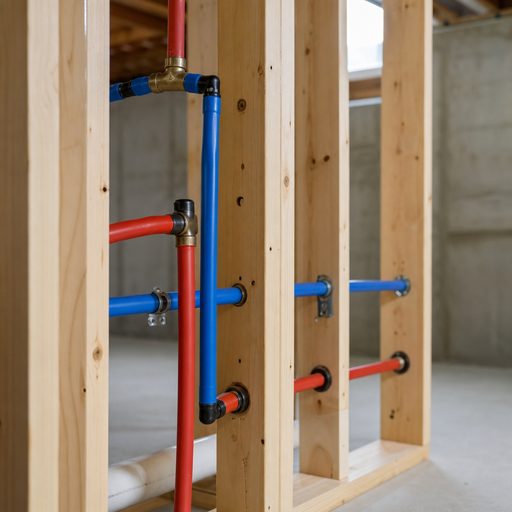
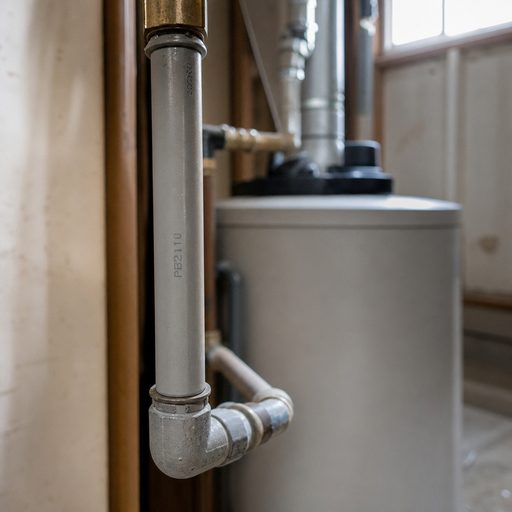
A whole-house repipe means replacing the water supply lines that run throughout your home—sometimes including drainage and vent pipes, but most commonly just the hot and cold water pipes. It typically involves removing old piping like galvanized steel, polybutylene, or worn copper, and installing new materials such as PEX, copper, or CPVC. A plumber will open sections of wall and ceiling to access hidden pipes and may need to temporarily move fixtures—such as toilets, sinks, and bathtubs—to reach every connection. Key plumbing components replaced during a repipe include supply lines, shutoff valves at every fixture, sometimes pressure reducing valves (PRV), and, if needed, portions of the main water shutoff.
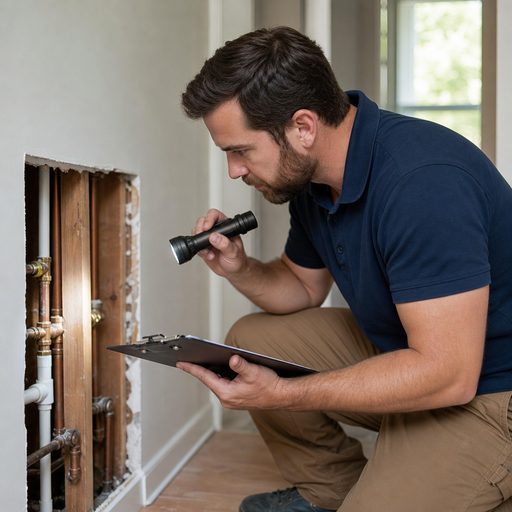
Professional repiping services follow a process that starts with an assessment. They’ll inspect existing pipes for corrosion, leaks, and signs of failure, then design a new routing plan that meets modern codes. This often means adding proper shutoff valves and earthquake straps or retrofits for seismic areas. Work is subject to local plumbing codes, so your contractor will obtain permits and arrange for inspection. Be prepared for a multi-day process, especially in larger homes. After new pipes are installed, drywall and ceilings are restored, and the water system is tested for pressure and leaks before completion.
What Factors Affect Repiping Cost the Most?
No two repipe jobs cost the same, because several variables play substantial roles. The overall size of your home matters first. A one-bath ranch house simply needs fewer materials and less labor than a sprawling two-story with three bathrooms and a finished basement. More square footage and more fixtures mean more pipe, more fittings, and more hours for installation and repair.
- Number of bathrooms, kitchens, and fixtures that require new connections
- Stories and square footage—multi-level homes need more vertical pipe runs
- Type of pipe material replacing and installing (PEX, copper, CPVC)
- How easily plumbers can reach existing pipes (slab vs. basement vs. crawl space foundations)
- Extent of walls, floors, or ceilings that need to be cut and restored
Copper, PEX, and CPVC: Choosing Materials for Your Repipe
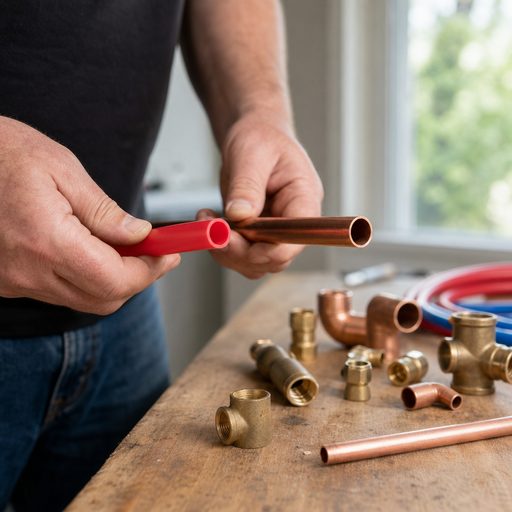
CPVC is another option, though less common, offering an alternative for those seeking plastic piping with somewhat higher temperatures tolerances than standard PVC. The pipe material you select not only affects the underlying product cost but also impacts installation time and complexity. Choosing between these materials is covered in more detail in PEX vs. Copper for a Repipe: How to Choose. If you’re not sure where your budget and priorities fit, a repiping professional can explain the benefits and drawbacks of each material in the context of your home’s layout and local water chemistry.
Wall, Floor, and Finish Restoration: The Hidden Part of Repiping Costs
One of the most significant, and often underestimated, drivers of a repipe’s overall cost isn’t just the plumbing work—it’s putting your house back together afterward. Plumbers commonly cut access holes in drywall, tile, cabinets, and ceilings to reach concealed pipes. If your home has custom finishes, intricate tilework, or historical features, restoration costs can increase substantially. Restoration involves patching drywall, patching or replacing tile, painting, and sometimes matching textures or finishes so the repairs blend in seamlessly with existing surroundings.
Good plumbers will try to minimize wall damage and limit cuts to what’s strictly necessary, but expect at least minor patching in most rooms containing water fixtures. For homeowners planning further remodeling or updating, this can be an opportunity to coordinate restoration with planned upgrades. When reviewing estimates, a clear separation between plumbing and finish restoration costs helps you understand what’s included. For guidance on these line items, ask your plumbing professional for a fully itemized quote.
When Does a Whole-House Repipe Make Sense?
Repiping your entire house is not a decision to take lightly. It makes sense when your plumbing system is experiencing widespread issues, such as frequent leaks, discolored or rusty water, reduced water pressure, or pipes made from obsolete or failed materials like polybutylene or galvanized steel. Old pipes may also show signs of corrosion, flaking, or persistent clogging. These signals suggest it’s no longer cost-effective to pursue patchwork repairs.
In some cases, limited pipe repair is the smarter immediate choice—see Pipe Repair for situations involving isolated leaks or small sections of damaged pipe. If you’re unsure whether your house truly needs repiping, reference the guide Does Your House Need Repiping? How to Decide for a checklist of red flags and evaluation steps. A qualified plumber uses diagnostic tools such as pressure gauges, moisture meters, and video inspection cameras to assess the overall system. Leak Detection services are especially useful for pinpointing unseen leaks before they cause significant water damage.
What to Expect During a Repiping Project
The process of a repipe is disruptive, but good planning and communication keep surprises to a minimum. After the assessment and selection of pipe material, plumbers create a plan that maximizes pipe accessibility while minimizing openings in your home’s finishes. The work often starts with water shutoff, followed by removal of old supply lines—sometimes segmented with saws or pipe cutters—and careful installation of the new piping. All affected areas, including upstairs bathrooms and kitchens, are addressed.
Repiping professionals replace not just the main pipes but also critical components like fixture supply lines, angle stops (shutoff valves under sinks and toilets), and, if needed, parts like the main water shutoff valve or pressure reducing valve (PRV). Once the new piping is in place, a pressure test is run to check for leaks. Permitted jobs conclude with an official inspection. After passing inspection, repairs to drywall, tile, and other finishes are made. Expect water service interruptions, but reputable plumbers try to limit downtime as much as possible. Larger homes or complex layouts may require several days to complete both plumbing and restoration phases.
- Detailed inspection of existing plumbing and fixture locations
- Water shutoff and protection of home furnishings
- Sawing drywall or making access openings as needed
- Removal of old piping, sometimes in sections
- Running of new PEX, copper, or CPVC pipes to meet code
- Replacement of shutoff valves, supply lines, and potentially pressure reducing valves
- Pressure testing new lines for leaks
- Scheduling of local inspection for code compliance
- Wall, ceiling, floor, and tile repair as needed
Comparing and Reviewing Quotes: What’s Included?
When you receive repiping estimates, compare not only the bottom line, but what is included at each stage. Some estimates may focus strictly on plumbing work, leaving finish restoration out or listing it as an extra, while others combine all restoration into one price. Ask for a detailed, line-item breakdown—including the type and brand of piping (such as Uponor PEX or Mueller copper), a list of fixtures and valves being replaced, and labor costs for both plumbing and restoration. This makes it easy to compare contractors and understand where budget differences arise.
Can You Limit or Delay a Whole-House Repipe?
If your pipes are showing some—but not all—signs of age or failure, targeted repairs can sometimes buy time before a full repipe is required. Isolated leaks can be fixed, and spot replacements are feasible if materials are compatible and the rest of your system is in good shape. Upgrading valves and replacing short sections of piping can resolve certain pressure or corrosion complaints without large-scale intervention.
Leak Detection services help pinpoint exactly which sections need attention, minimizing unnecessary wall cuts and disruption. However, when old pipes show systemic trouble, piecemeal fixes may quickly add up. Evaluate the frequency of leaks, the presence of low water pressure, and evidence of water damage before deciding. If you’re facing repeated issues, talk to a repiping specialist—many homeowners save money in the long run by addressing the entire system at once.
Warning: Do Not Attempt DIY Repiping or Cut Corners
Removing and installing supply lines involves skills, tools, and code knowledge beyond typical DIY plumbing repairs. Mistakes can lead to leaks, water damage, or code violations. Always use a licensed, insured professional for any repiping job.
How do I know if my house needs repiping?
Common signs include frequent leaks, rusty or discolored water, low water pressure, and pipes made from old or recalled materials (such as polybutylene or galvanized steel). A professional inspection can confirm if a repipe is required or if targeted repairs are sufficient. See our guide Does Your House Need Repiping? How to Decide for more details.
How long does whole-house repiping take?
Repiping most homes takes several days. The plumbing portion typically lasts two to five days, depending on home size and complexity. Finish repairs (like drywall patching and painting) may require extra time. Your plumbing professional should give you a work schedule before starting.
Will I have to move out during the repipe?
Most homeowners do not need to move out, but there will be periods each day when water service is interrupted. Plumbers often try to keep at least one bathroom working overnight. It’s a good idea to discuss logistics with your contractor before work begins.
Are permits and inspections always required for a repipe?
In almost all jurisdictions, yes. Whole-house repiping typically requires building permits and scheduled inspections to ensure work meets plumbing codes. Your plumbing professional should handle this process and provide documentation when complete.
Sources and further reading
These references support material safety, technical, consumer, or planning guidance in this article. Confirm property-specific requirements with the applicable authority and professional.
- U.S. EPA WaterSense - Home maintenance
- U.S. EPA WaterSense - Fix a Leak Week
- NSF - Safety of PEX plumbing products
- NSF - Faucets and plumbing products
- U.S. Geological Survey - Hardness of water
- U.S. Geological Survey - Water corrosivity
- National Association of Insurance Commissioners - Homeowners insurance